Student Guide
Configuring Your Profile
In the profile settings, you can customize your Starfish experience. The Edit Profile page is a place where you can add additional contact information to set up text message notifications. This information is visible to faculty, academic, and support advisors. The Notifications page is where you determine how you want to receive meeting reminders.
Edit Profile
- Access Starfish
- From the Starfish My Success Network page, click the
 navigation menu (upper left corner of the screen), click your name, and then click Edit Profile.

- On the top menu bar, confirm you are on the Edit Profile tab. On the Edit Profile tab, update your information:
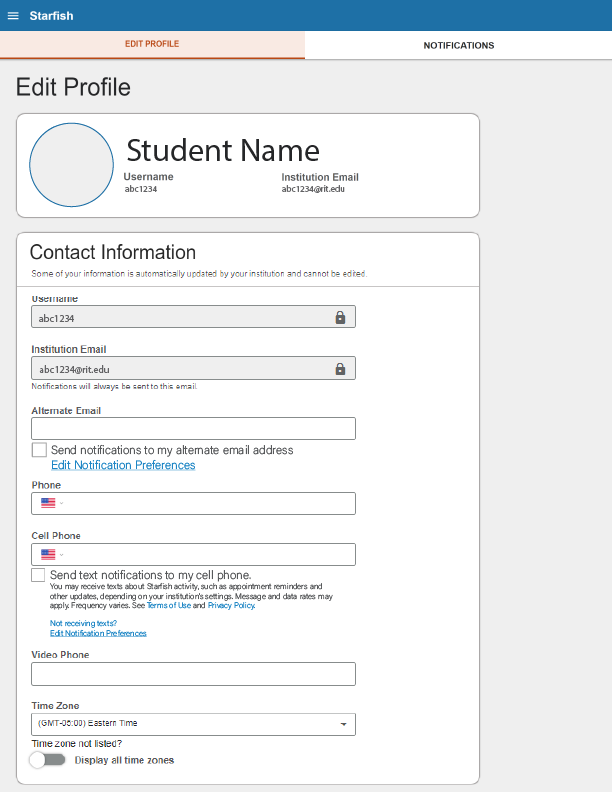
- Photo, User Name & Institutional Email are pulled from SIS and displayed in Starfish. User Name and Institutional Email fields can not be edited. Photos are imported directly from ID Card images. For more details about how to change your photo, click here.
- Alternate Email:
- If you would like communications also sent to an alternate email address, add your other email address, and then click the box for Send notifications to my alternate email address.
- If you would like communications also sent to an alternate email address, add your other email address, and then click the box for Send notifications to my alternate email address.
- Phone: This information is pulled from SIS; if it's inaccurate, click here to view instructions on how to update your phone in SIS.
- Cell Phone: If your cell phone is stored in SIS, it will display here; if no number displays, you can add a number here. If your cell phone is not a US phone number, click on the flag to designate the country.
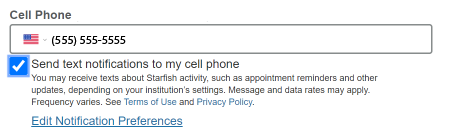
- Text Notifications:
- If you would like to have communications sent via text message, click the blue check box
 for Send text notifications to my cell phone.
- If you would like to have communications sent via text message, click the blue check box
- Video Phone: If you have a video phone, you may enter the information here.
- Time Zone: The default is (GMT-05:00) Eastern Time, if you are taking classes from any other timezone, check the Display all time zones button and then select your time zone.
- Click the Save Changes button to save all changes you have made to the page.
Notification Preferences
- On the top menu bar, select the Notifications tab.

- On the Notifications tab, update your preferences:
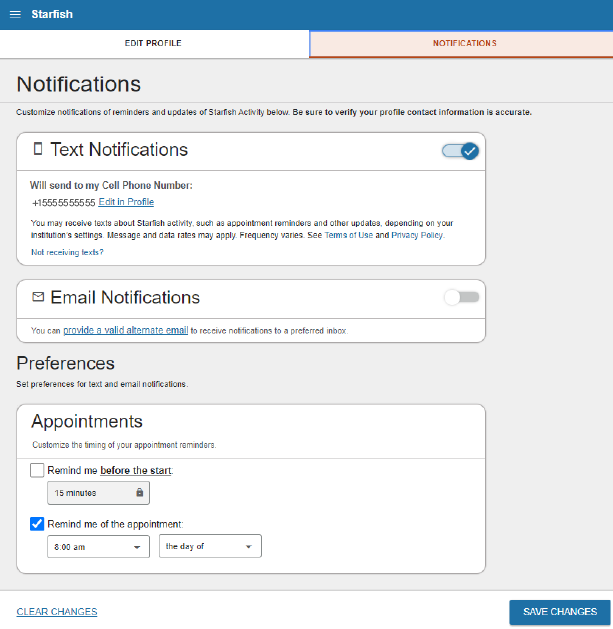
- Email Notifications - Toggle the button on or off to determine if you want to receive notifications to your Alternative Email (provided on the previous tab) and your RIT email address.
- Preferences - Appointments - We recommend leaving the default checked to receive a reminder about advising appointments set up in Starfish.
- If you would like to receive an email reminder about your appointment before the start of a meeting, check the box and select the timing of the reminder.
- If you would like to receive an email reminder about your appointment first thing in the morning, we recommend leaving the default 8:00 am email reminder checked.
- Click the Save Changes button to save all your changes on the page.
Starfish Quick Links: