PaymentWorks Guide for Suppliers
RIT PaymentWorks Guide Introduction
**A downloadable copy of this guide can be found here**
RIT has partnered with PaymentWorks, a third-party vendor onboarding and maintenance tool. With PaymentWorks, departments can now act as “Initiators” and send PaymentWorks registration invitations directly to their vendors before submitting a payment request.
- Invitations can be sent at any time before a requisition is ever submitted.
- Creates greater efficiency for payment.
- Reduces efforts and time required for vendors to distribute new payment information.
- Decreases fraud risk by validating vendor information before payment is issued.
Vendor Registration in PaymentWorks
As a vendor conducting business with RIT, you will receive an invitation to participate in the PaymentWorks platform. Before beginning your PaymentWorks registration process, please make sure you have a tax form and bank validation file on hand for upload.
Bank Validation includes one of the following:
- Letter on company letterhead
- Voided Check
- Voided Deposit slip
- Bank Statement
- Letter from your bank
Initial Sign Up with PaymentWorks
-
Complete your information
-
Create a password
- Submit information
-
Once information is submitted, PW support will send a confirmation email to you to verify your email address within 72 hours.
-
- Sign in and complete the remaining information
- The process will prompt a multi-factor authentication step (phone call OR text to you).
- If you are having trouble with multi-factor authentication, please contact PW support for assistance.
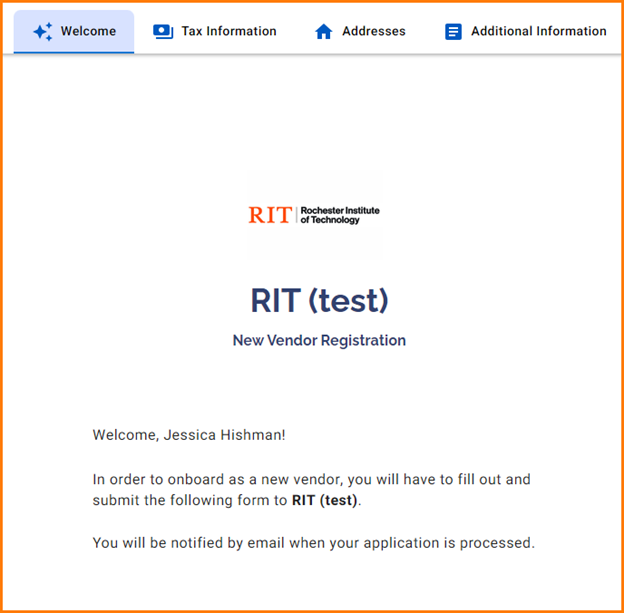
Completing the NVR (New Vendor Registration) for RIT
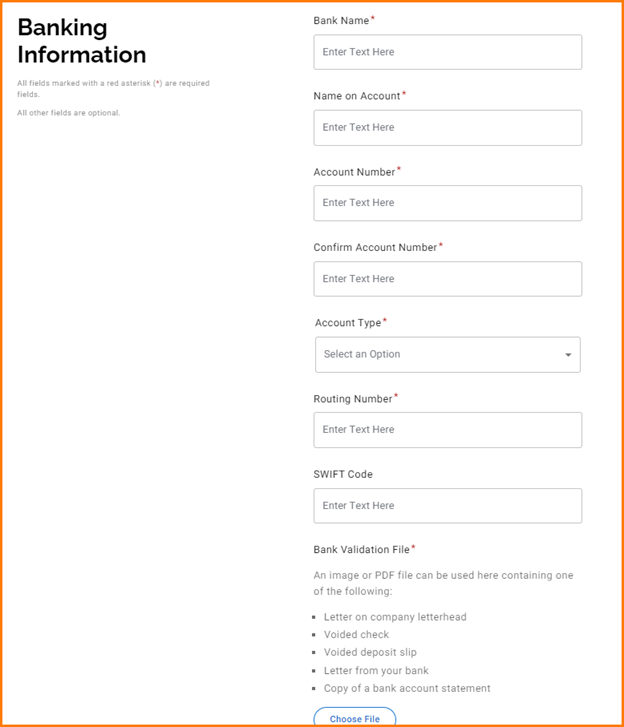
When your account is confirmed, below is the screen you should see to complete the NVR specific to RIT.
The below sections will help guide you through this process.
Please note that required fields are marked with an * throughout the registration form.
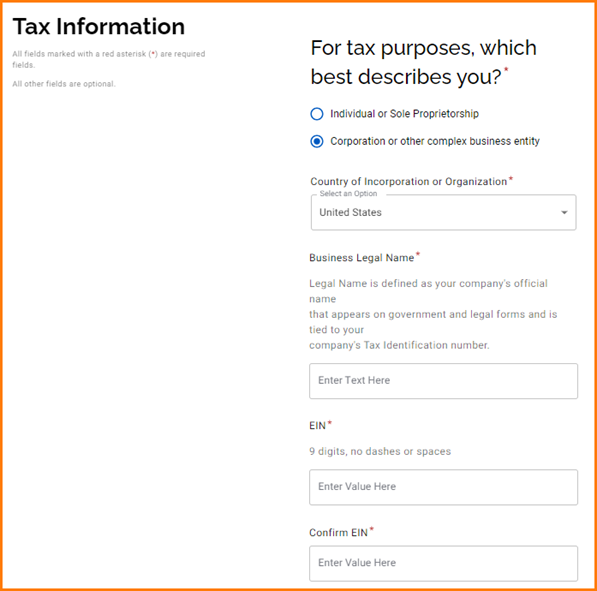
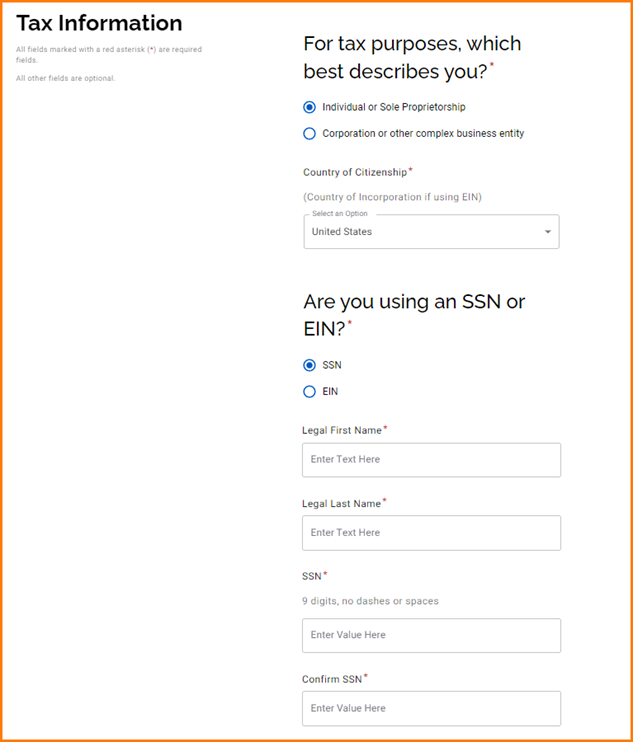
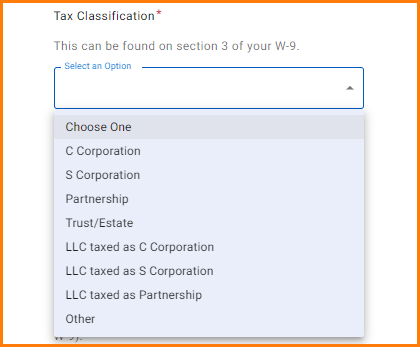
General Tax Information
Identify ownership type, country of citizenship, and type of taxpayer identification number. Identify taxpayer identification number as either Social Security Number (SSN), Employer Identification Number (EIN), Individual Taxpayer Identification Number (ITIN) or Foreign Taxpayer Identification Number.
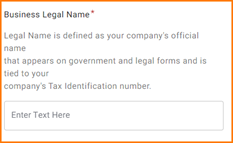
Do not enter a Doing Business As (DBA) name in the Legal Name field. The Company Information section includes a field for business, trade, or DBA name.
- TIN or Taxpayer Identification Number – This an ID number used by the IRS to identify taxpayers. This field is required by PaymentWorks for all registrations. If you do not have a TIN, please contact PaymentWorks support for a substitute number.
- SSN or Social Security Number – A nine-digit number that the US Social Security Administration issues to US citizens, permanent residents, and temporary (working) residents.
- ITIN or Individual Taxpayer Identification Number – a US tax processing number the Internal Revenue Service issues to people who are required to have a US taxpayer identification number but who are not eligible to obtain a social security number.
- EIN or Employer Identification Number (or Federal Employer Identification Number) – a unique nine-digit number assigned by the Internal Revenue Service to businesses operating in the US.
- Foreign Taxpayer Identification Number – a taxpayer identification number that may be issued by a country other than the US to an individual, business, or any other entity. Both foreign individuals and entities that do not have a US taxpayer ID number should select this option.
IMPORTANT: If you do not enter your Business Legal Name and Tax Information number exactly as indicated on your tax documents, your registration will be returned to you for correction. RIT cannot reissue an invitation at this stage.

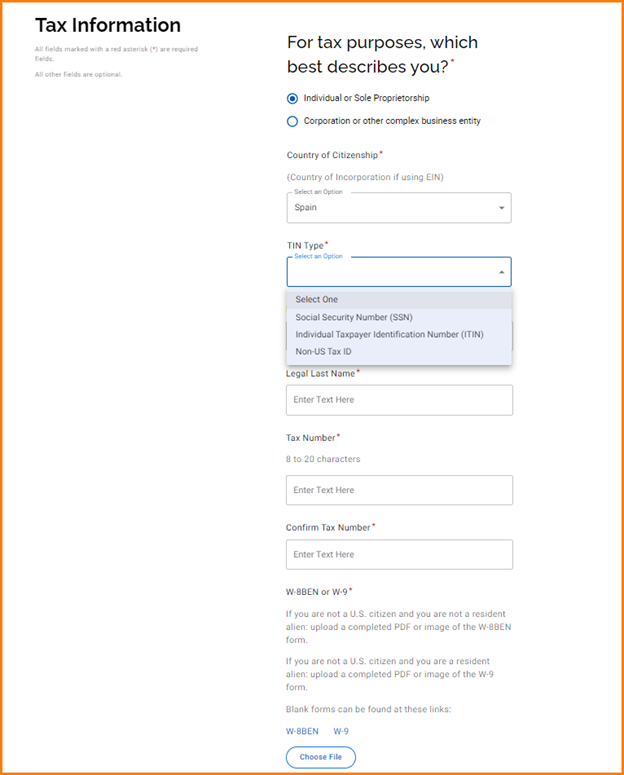
Additional Tax Information: Foreign Entity
You will be asked to describe your ownership type, identify your country of citizenship, identify the type of taxpayer identification number, provide your legal name, taxpayer identification number, and attach an IRS Form W-8BEN.
The taxpayer identification number options are:
- Social Security Number – a 9-digit numerical identifier assigned to U.S. citizens and other residents by the United States Social Security Administration
- Individual Taxpayer Identification Number – issued by the United States Internal Revenue Service, this numerical identifier is used to help individuals comply with the U.S. tax laws, and to provide a means to efficiently process and account for tax returns and payments for those not eligible for Social Security numbers
- Foreign Tax Identification Number – may be issued by your country of citizenship/incorporation
If you do not have any taxpayer identification number, please contact PaymentWorks support for a substitute number. Substitute numbers (Called a Placeholder ID in PW) will be routed to RIT for approval.
IMPORTANT: W-8BEN: Please ensure that the W-8BEN form that you upload is completed correctly. We will ensure that our financial system records correspond to your W-8BEN.
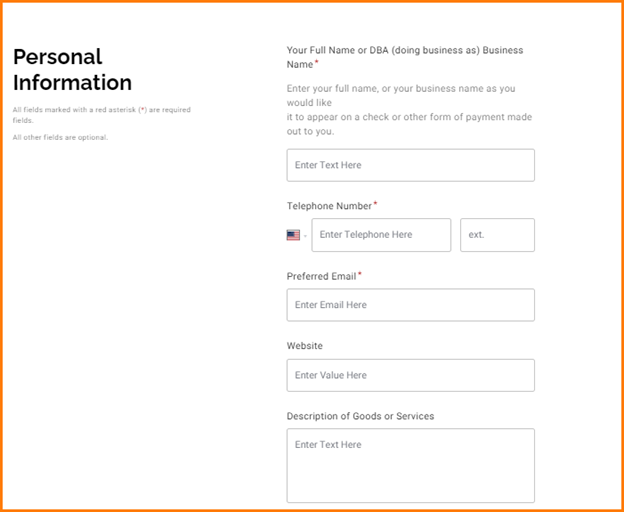
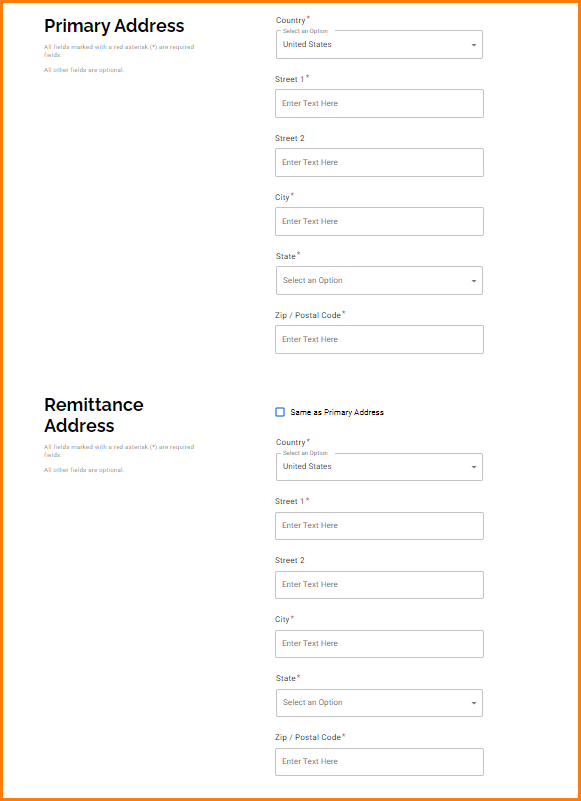
General Information: Address
Primary Address
This is the address where you would want tax-related information set.
Remit Address
This is the address where payment should be mailed, if different from primary and selecting check payment.
If the remit address is the same as your primary, please check the box so you can bypass entering the address a second time.
General Information: Additional Information
It is important to fill out the information in this section correctly otherwise your registration may be sent back. If you have questions on any of these, please reach out to accpay@rit.edu.

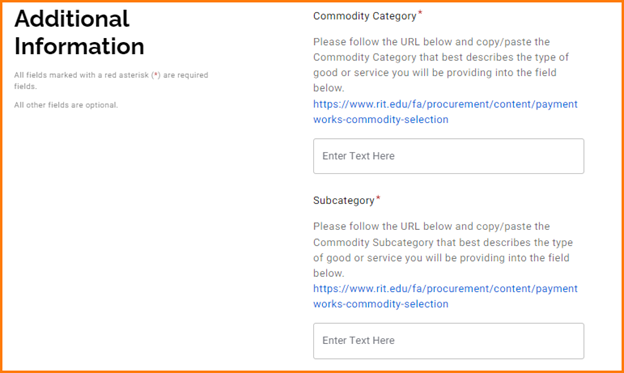
General Information: Commodity Selection
Please select the best commodity/sub-commodity your business fits into from the allowed list (must match exactly). This helps RIT classify vendors for reporting uses.
The link for commodities/sub-commodities is located here: https://www.rit.edu/fa/procurement/content/paymentworks-commodity-selection
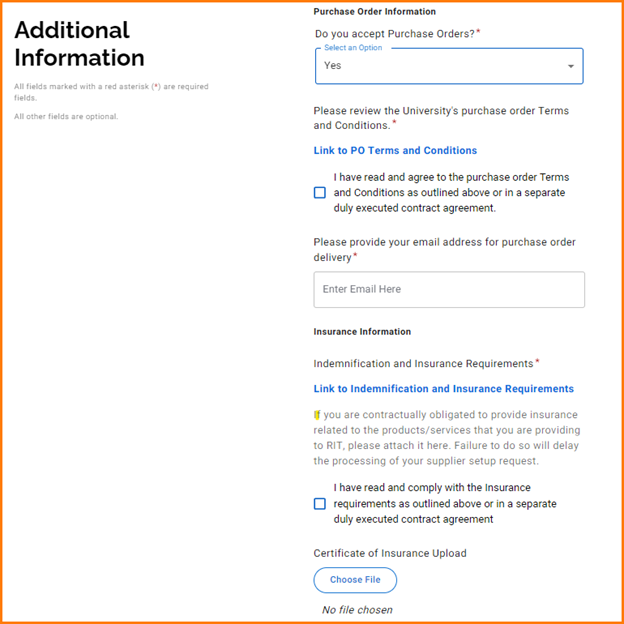
Additional Information: PO T&C's/Insurance
PO T&C’s: If you select “yes” to PO vendor and you are providing services/goods on campus, the PO T&C’s will apply unless you have a separate contract agreement.
Insurance: If services are being provided, you must provide your Certificate of Insurance naming RIT as additional insured with your registration. Our limits are located here: Indemnification & Insurance Specifications | Procurement Services | RIT
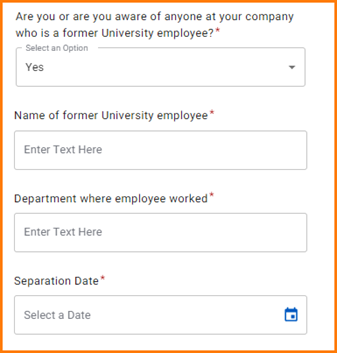
General Information: Conflict of Interest
All vendors/payees are asked to provide a response to the conflict-of-interest questions.
IMPORTANT: This does not prevent RIT from doing business with you; it is put into place to ensure RIT is aware and can take appropriate steps to manage the conflict.

If you select “yes” additional fields will populate asking for further information about the conflict in question.
General Information: Bank/Payment Method
All vendors/payees are required to select bank/method of payment and fill out the banking information as it populates.

ACH is always the preferred method of payment. If ACH is selected, additional information will be required. Wire will populate for international supplies.
IMPORTANT: PaymentWorks will contact you to verify banking information via a phone call to reduce ACH/Wire fraud. Please respond to this call to speed up the approval of your registration.

At this point, you have the option to submit the form now or save your work for a later date.
Once the form is submitted, it will be reviewed by PaymentWorks prior to RIT. You will receive confirmation of your submission and will be notified via email once RIT has completed the registration process.
Adding Users to My PaymentWorks Account
Additional users can be granted access to your PaymentWorks account. They are able to view and manage all account information using their own separate login. Once a new user has been added, they will receive an email with the necessary instructions.
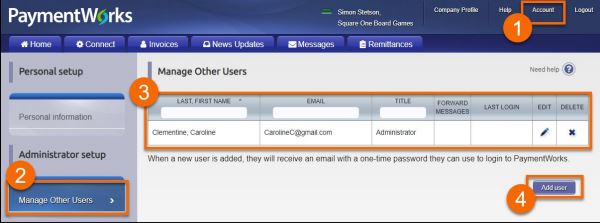
1. Log in to PaymentWorks and click Account at the top of the screen
2. Click Manage Other Users from the navigation menu
3. This table displays the list of current users who have access to your account
4. Click the Add user button
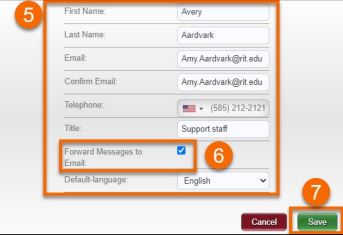
5. Enter the appropriate user information into the fields provided
6. If the Forward Messages to Email checkbox is selected, any messages sent to the PaymentWorks account will also be emailed to this user
7. Click the Save button to grant this user access to your PaymentWorks account
Managing Remittance Addresses
Adding New or Additional Remittance Addresses
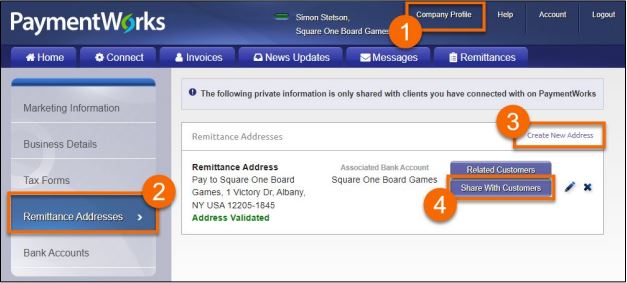
1. Log in to PaymentWorks and click Company Profile at the top of the screen
2. Click Remittance Addresses from the navigation menu
3. New or additional addresses can be created for your profile by clicking the Create New Address hyperlink
4. Once a new address is created, allow your customers to see this information by clicking the Share With Customers button

Updating or Deleting Remittance Addresses
1. Update an address by clicking the corresponding pencil icon (refer to the image on the following page)
2. Delete an address by clicking the corresponding x icon

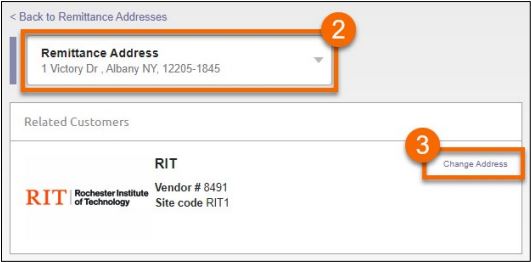
Changing the Remittance Address for a Customer
1. Click the Related Customers button to view a list of customers associated with the address
2. A new screen appears with the list of customers that have access to your selected address (this can be switched by using the drop-down field at the top)
3. Click the Change Address hyperlink for a selected customer
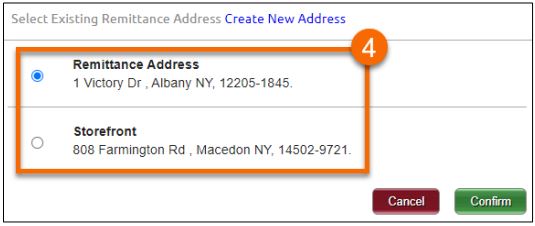
4. The address associated with this customer can now be changed
Updating Bank Account Information
Adding a New Bank Account in PaymentWorks
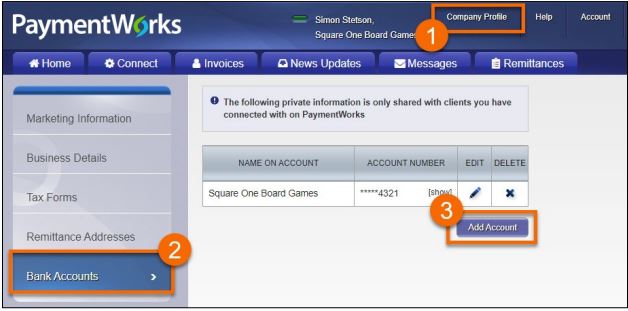
1. Log in to PaymentWorks and click Company Profile at the top of the screen
2. Click Bank Accounts from the navigation menu
3. Click Add Account to begin the process of adding new banking information
4. You’ll need the following details when setting up a new bank account:
- Name associated with the account
- Account number and type
- Bank address and routing number
- Account verification file
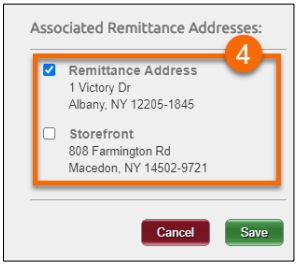
5. When completing this workflow, select one or more remittance addresses to associate with the bank account

Changing the Remittance Addresses Associated with an Account
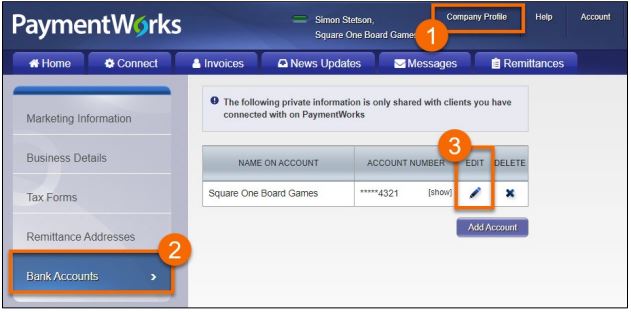
1. Log in to PaymentWorks and click Company Profile at the top of the screen
2. Click Bank Accounts from the navigation menu
3. Click the pencil icon next to the selected bank account to edit the details
4. Select one or more addresses that you would like to associate with this account

Updating Business Details and Tax Classification
Making Changes to Business Information
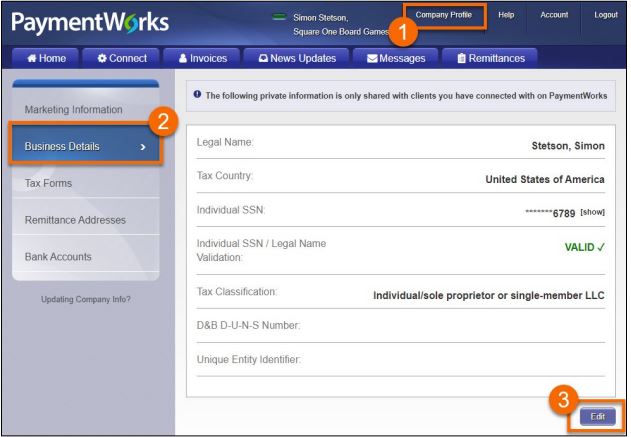
1. Log in to PaymentWorks and click Company Profile at the top of the screen
2. Select Business Details from the navigation menu
3. Your business information and tax classification can be updated by clicking the Edit button at the bottom of the screen

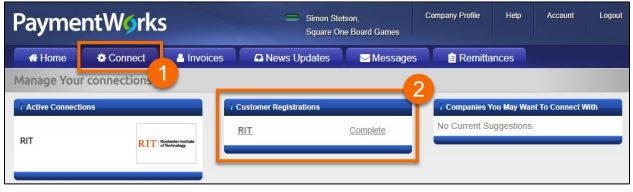
Making Changes to the New Vendor Registration Form
When joining PaymentWorks for the first time, you completed the New Vendor Registration form. In some circumstances, changes need to be made to this information after it’s been submitted. Follow the steps below to edit your registration details. Once any changes are made, they are re-submitted to RIT for approval.
1. Log in to PaymentWorks and click Connect at the top of the screen
2. Within the Customer Registrations section, find and click the RIT Registration row (the status for this registration may be listed as In Progress or Complete)
3. Your New Vendor Registration form appears and you can make changes to the following information:
- Supplier and tax categories
- Honorarium/Stipend designation
- Commodity and NAICS codes
- Purchase order details
- Insurance information
- Contact information
- Conflict of interest statements
- Banking details
4. Click the Submit button at the bottom of the form to send your requested changes to RIT for approval