How to Process Employee Expense Reimbursements
In order for RIT employees to receive reimbursements for travel and other business-related expenses, an expense report must be submitted and approved in Oracle. The sections below provide detailed instructions for submitting a TER request in the system. A TER Tutorial Video with accessibility features is also available on the Training Resources web page.
Create a New Reimbursement Request
- Log in to Oracle and navigate to your list of responsibilities.
- For reimbursements that include airfare or an overnight stay:
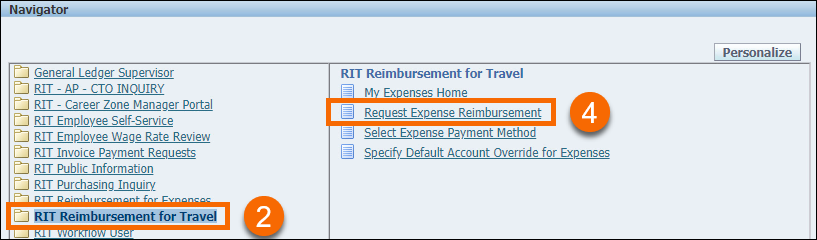
- Click RIT Reimbursement for Travel to expand the TER navigation menu (refer to the image above)
- For reimbursements that do not include airfare or an overnight stay:
- Click RIT Reimbursement for Expenses responsibility instead
- Disregard the Per Diem step below (meals are reimbursed based on receipts)
- In either responsibility, click Request Expense Reimbursement to begin the reimbursement request process.
General Information
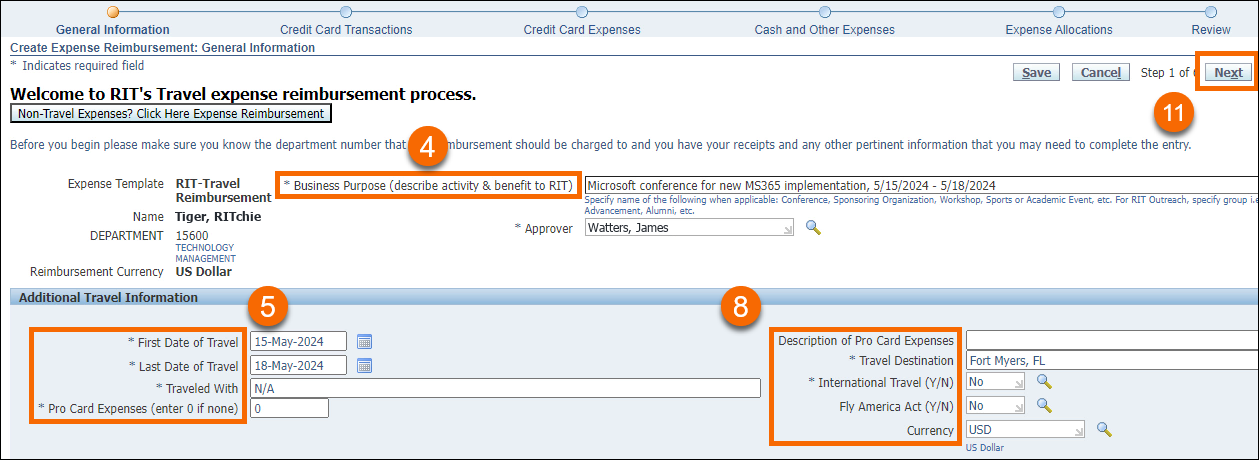
The General Information screen includes basic information about the trip.
- Enter a detailed description of the Business Purpose for the trip.
- Enter the First Date and Last Date of travel.
- Identify any additional travelers that joined you on the trip (enter "N/A" if there were no other travelers).
- If there were expenses charged to a University P-Card, enter the total amount in the Pro Card Expenses field (otherwise enter "0" if there were no P-Card expenses).
- A Description of Pro Card Expenses is required if applicable, otherwise this field can be left blank.
- Enter the primary Travel Destination.
- Indicate whether or not this request is for International Travel. If yes, indicate whether this trip aligns with the Fly America Act and identify the Currency used for the majority of the trip.
- When finished, review the information and click Next.
Credit Card Transactions
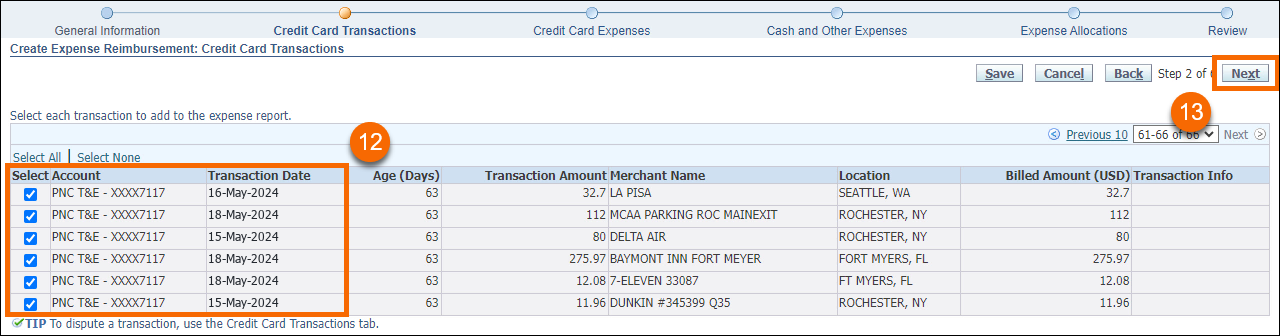
The Credit Card Transactions screen will only appear for a user if a PNC Travel card has current charges on it that can be applied to the reimbursement request. If this screen is not available when completing the TER request, continue to the next section.
- Select any applicable credit card charges by placing a checkmark next to each row (refer to the image above).
- Click Next to continue.
Credit Card Expenses
Enter and Verify Business Expenses
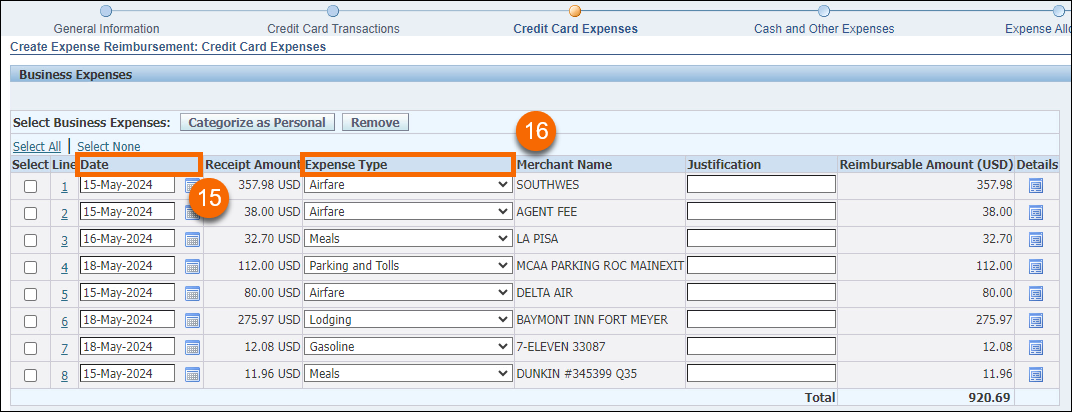
By default, all items that initially appear on the Credit Card Expenses screen are categorized as Business Expenses.
- Verify that the credit card transactions pertain to the TER you are currently working on.
- Modify the purchase Dates as needed to match your physical receipts. For airline charges, verify and/or adjust the dates to align with your actual flight dates.
- The Expense Type is based on the merchant MCC code. Please verify that these labels are correct for all expenses and change them to the appropriate categories if needed.
IMPORTANT: All original receipts and documentation pertaining to your expenses must be retained in your department for the number of years specified in the RIT Legal Office Document Retention Guidelines.
Categorize Expenses as "Personal"
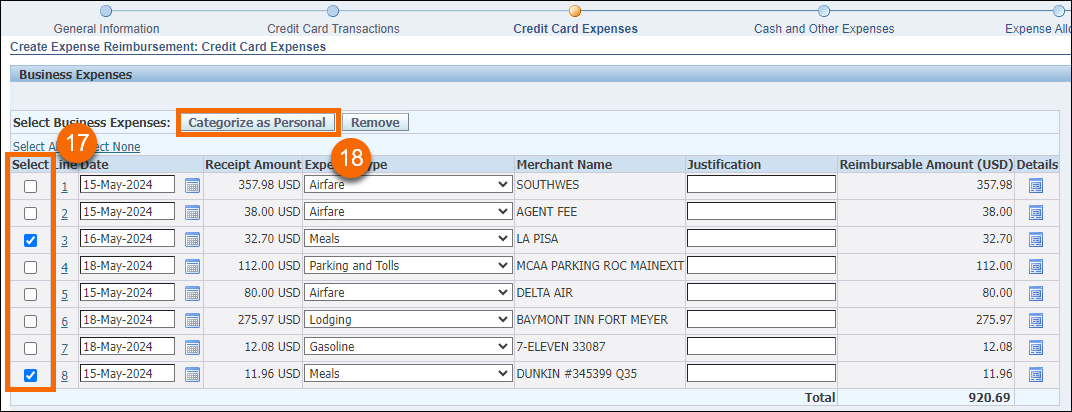
Personal expenses are not reimbursable and must be identified on this screen. Follow these steps to mark an expense as "personal."
- Select the expense(s) that you wish to be marked as "personal."
- Click the Categorize as Personal button. Personal expenses will not appear on this screen when completing future TER requests.
- Note that clicking the Remove button will remove the expense(s) from this specific TER request (i.e. it will still appear when completing future TER requests).
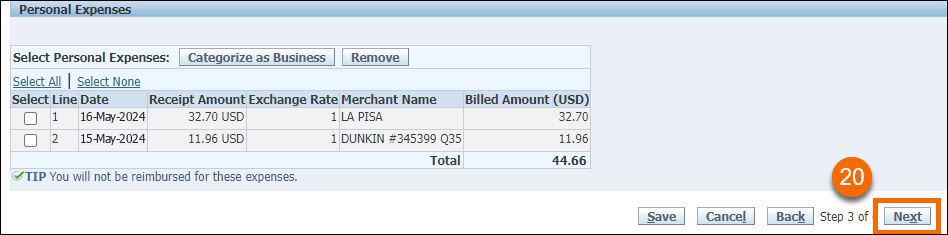
- The bottom of the screen now displays expenses that have been marked as "personal."
- When finished, click Next to continue.
Cash and Other Expenses
The Cash and Other Expenses screen contains three separate tabs for documenting different transactions (these tabs are outlined in the sections below):
- Receipt-Based Expenses: Used for entering expenses with physical receipts.
- Per Diem Expenses: Used for electing to receive the per diem rate for meals instead of providing receipts.
- Mileage Expenses: Used for entering mileage totals for the trip.
Receipt-Based Expenses
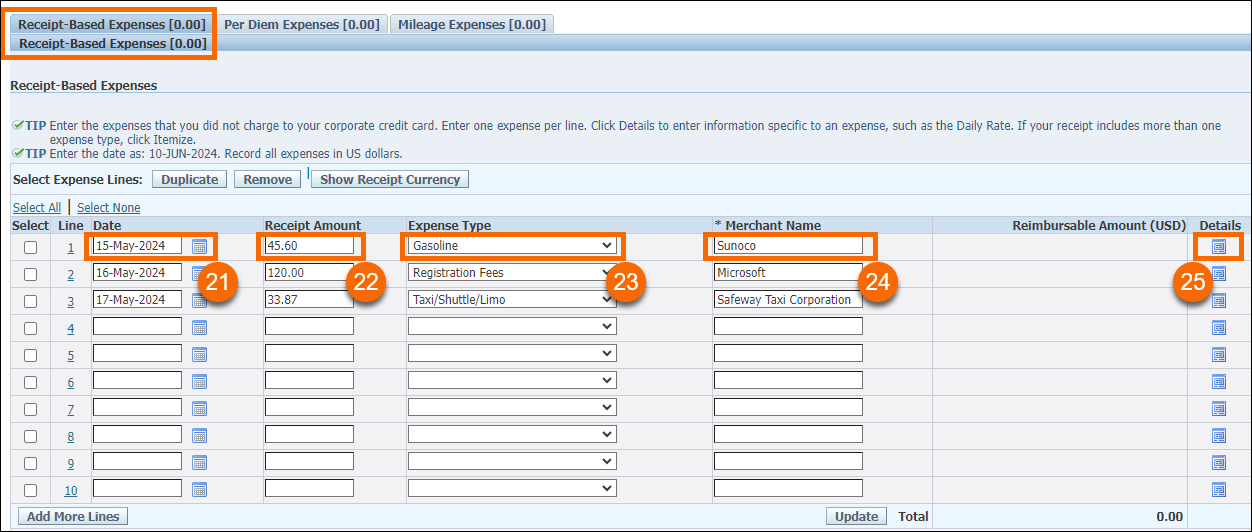
For each row on this screen, enter a different receipt-based expense to request reimbursement.
- Enter the Date of the transaction.
- Enter the Receipt Amount.
- Identify the Expense Type by selecting the corresponding label from the drop-down box.
- Enter the Merchant Name.
- If the Expense Type is "Hospitality" or "Miscellaneous," click the Details icon to enter additional information.
Per Diem Expenses
As of May 1, 2024, RIT has adjusted how per diem expenses are entered into Oracle. Click the button below to view detailed instructions for entering per diem expenses. Per diems are only allowable for travel dates that include an overnight stay. Day trips without an overnight stay will be reimbursed based on receipts.
Mileage Expenses
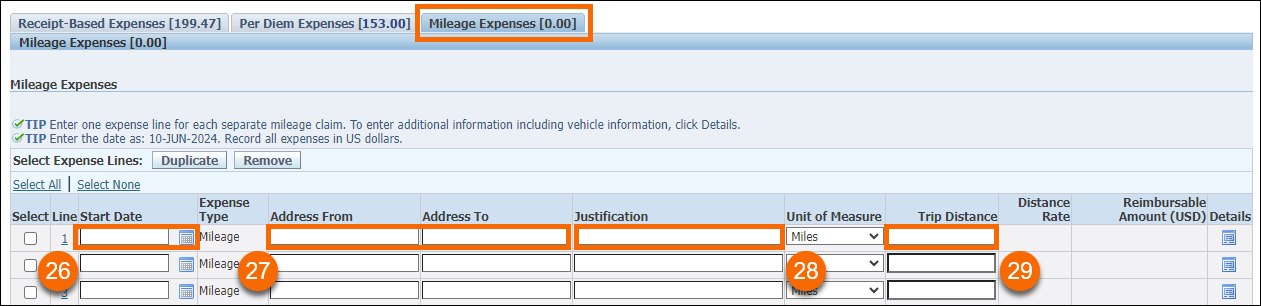
- Enter the Start Date of travel.
- Enter the Starting Address and Ending Address.
- Provide a detailed Justification for this travel.
- Enter the Trip Distance (according to the indicated Unit of Measure).
If all three tabs are completed, click Next to continue to the next screen.
Expense Allocations
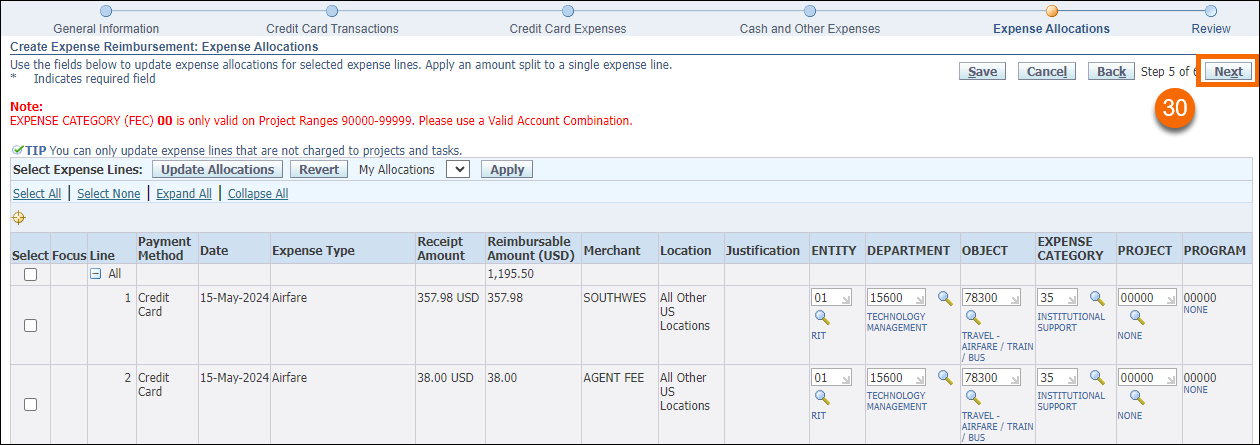
The Expense Allocations screen provides you an opportunity to review the account codes assigned to each expense. For each expense, the department charged is generated from your Payroll record in the system (unless there is a default expense allocation set up). Object codes are determined by the expense types and should not be adjusted. If necessary, adjust the account codes on this screen.
- After reviewing the information for accuracy, click Next to continue.
Review
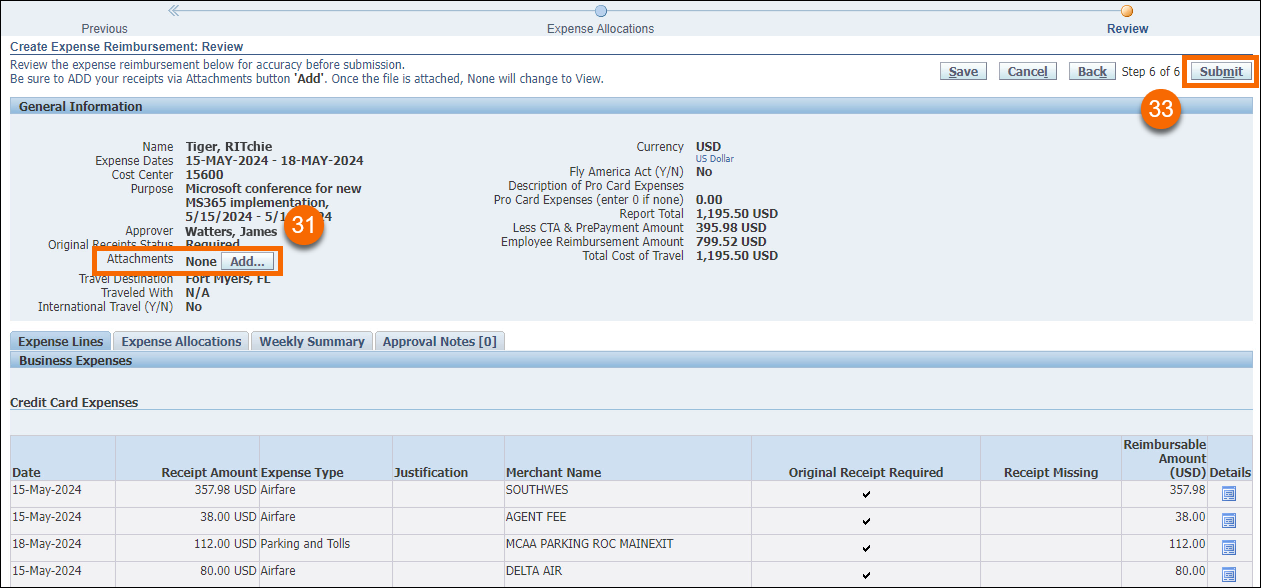
The final Review screen displays all the information entered into the TER request.
- Click the Add button to attach the appropriate documentation to the TER request (follow the prompts to select your file and provide a title/description). Please attach only one document that contains all your receipts, maps, and other information (Adobe Acrobat is preferred to combine multiple documents into one single file).
- Review all the information on this screen for accuracy.
- When finished, click Submit.
The TER request has now been submitted for approval. It can be viewed from the Expenses Home screen (located in the top-left corner of Oracle).